





How to Play Pixeler Drawing Game-Pixeler Drawing Game
Similar Games




Getting Started
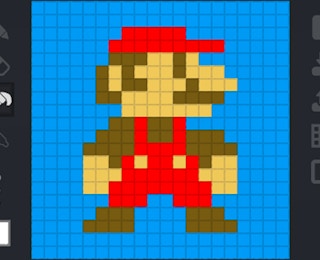
- Open the game in your browser and become familiar with the pixel grid.
- Decide what you want to draw. Beginners often do well with simple subjects: a fruit, a heart, a star, a hat, or a small character face.
- Choose a background color first. This establishes the canvas tone and helps you judge contrast.
- Pick a main color for the largest part of the subject.
- Place pixels one cell at a time to block in the overall shape.
Step-by-Step Drawing Process
The most reliable way to play Pixeler Drawing Game is to treat it like a miniature construction project. Start with big masses, then add medium details, then finish with small accents. This prevents the common beginner problem of drawing a perfect eye before the head shape exists.
1. Block the Silhouette
Use one color to fill the outer shape of your subject. At this stage, do not worry about shading. The goal is to make sure the outline reads clearly against the background. If you are drawing a character, check whether the head, body, and limbs are proportionally recognizable.
2. Add Major Color Zones
Once the silhouette is in place, divide the subject into large areas: hair, skin, clothing, shadows, and highlights. Choose colors that are distinct enough to separate these zones. The large palette makes it possible to use related tones instead of only black and white.
3. Refine Edges
Pixel art often looks cleaner when edges are intentional. Decide whether you want hard outlines, soft transitions, or no outline at all. Apply darker or lighter pixels along borders only where they improve readability.
4. Place Details Sparingly
Small details such as eyes, buttons, highlights, and texture marks should be added last. Because each detail occupies a whole cell, too many small marks can make the image noisy. Test whether each detail is necessary from a normal viewing distance.
5. Review and Correct
Step back mentally and inspect the whole grid. Look for accidental gaps, uneven shapes, or colors that blend too much. Repaint individual cells as needed until the image feels balanced.
Quick Start Idea
A good first project is a simple face: choose a skin tone, block a rounded head, add two eye cells, a mouth line, and a hair shape. Then experiment with one shadow color under the hair and one highlight color on the cheek. This teaches silhouette, palette selection, and detail placement in one compact exercise.
Session Workflow
A productive Pixeler Drawing Game session works best when you separate planning, blocking, refining, and reviewing. Instead of jumping directly into details, follow a repeatable workflow that takes advantage of the grid and the large color palette.
Phase 1: Choose a Reference or Concept
Decide whether you are drawing from imagination, copying a familiar sprite-style character, or designing an original icon. A reference can be especially helpful for proportions, but avoid tracing cell by cell without understanding the shape. Ask yourself what the three largest color areas will be.
Phase 2: Build a Palette Map
Before filling the whole grid, choose a small working palette from the available 1000+ combinations. A practical palette map might include: one background color, one base color, one shadow color, one highlight color, and one accent color. Limiting yourself during the early phase keeps the image coherent.
Phase 3: Lay Down Background and Base Shapes
Start with the background or the largest mass. Then add the main body shapes. This phase should feel fast and rough. The objective is coverage, not polish. If the base shape does not read clearly, adjust it before adding details.
Phase 4: Establish Light and Dark
Pixel art gains depth through value contrast. Decide where the light source is, then place shadow pixels on the opposite side and highlight pixels where light would hit. With many color options available, you can create subtle shifts instead of harsh black shadows.
Phase 5: Add Texture and Accent Pixels
Texture should suggest material without overwhelming the image. For example, a few alternating pixels can imply fabric, hair strands, stone, or sparkle. Accents such as eyes, jewelry, logos, or bright edges should guide attention to the focal point.
Phase 6: Final Readability Check
Review the drawing as a whole. Ask: Is the subject recognizable? Are the darkest and lightest areas doing their job? Are there stray pixels that distract? Correct only the cells that improve clarity. Overworking a pixel drawing can reduce its clean, graphic charm.
Recommended Practice Loop
- Spend two minutes planning the subject and palette.
- Spend five minutes blocking major shapes.
- Spend three minutes adding shadow and highlight.
- Spend two minutes placing final details.
- Review the whole grid and make no more than five corrective changes.
This loop helps players build momentum while preventing endless small edits. Over time, the workflow becomes intuitive, and the game becomes less about figuring out what to do next and more about making deliberate artistic choices.